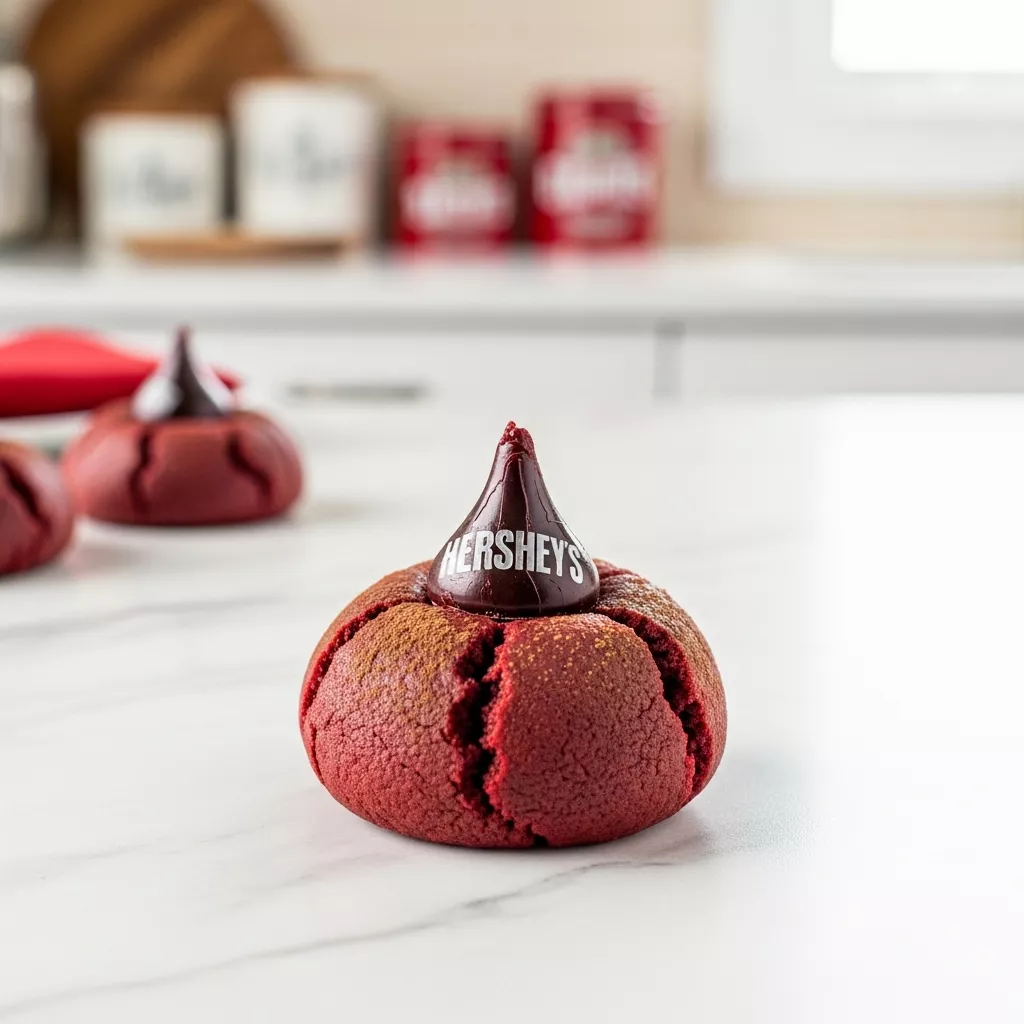
I remember the first time I saw red velvet blossoms cookies. It was at a holiday bake sale, and the vibrant red color against the snowy white Hershey’s Kiss instantly caught my eye. My mom bought a whole plate, and I devoured at least three before we even got home.
That sweet, slightly tangy flavor combined with the creamy chocolate was pure bliss. They became a tradition in our family, and now I make them every year, thinking of those happy, simple moments. These cookies aren’t just a dessert, they’re a little piece of my heart.
These red velvet blossoms cookies are also surprisingly easy to make, and the results are always a crowd-pleaser! They are the perfect addition to any holiday cookie platter, or just a fun treat to make on a rainy afternoon. Speaking of traditions, I recently discovered some amazing apple cider cupcakes, which would pair perfectly with these cookies for a fall gathering.
Why you’ll love this Red Velvet Blossoms Cookies
- The beautiful red color makes them perfect for holidays or any special occasion.
- The soft, chewy texture and unique flavor of red velvet combined with the chocolate kiss are simply irresistible.
- This red velvet blossoms cookies recipe is easy to follow, even for beginner bakers.
- They are incredibly versatile – you can add sprinkles, use different flavors of Hershey’s Kisses, or even add chocolate chips to the dough.
- They make a wonderful homemade gift for friends and family.
- The combination of flavors and textures in red velvet blossoms cookies is a delightful treat that everyone will enjoy.
Ingredients
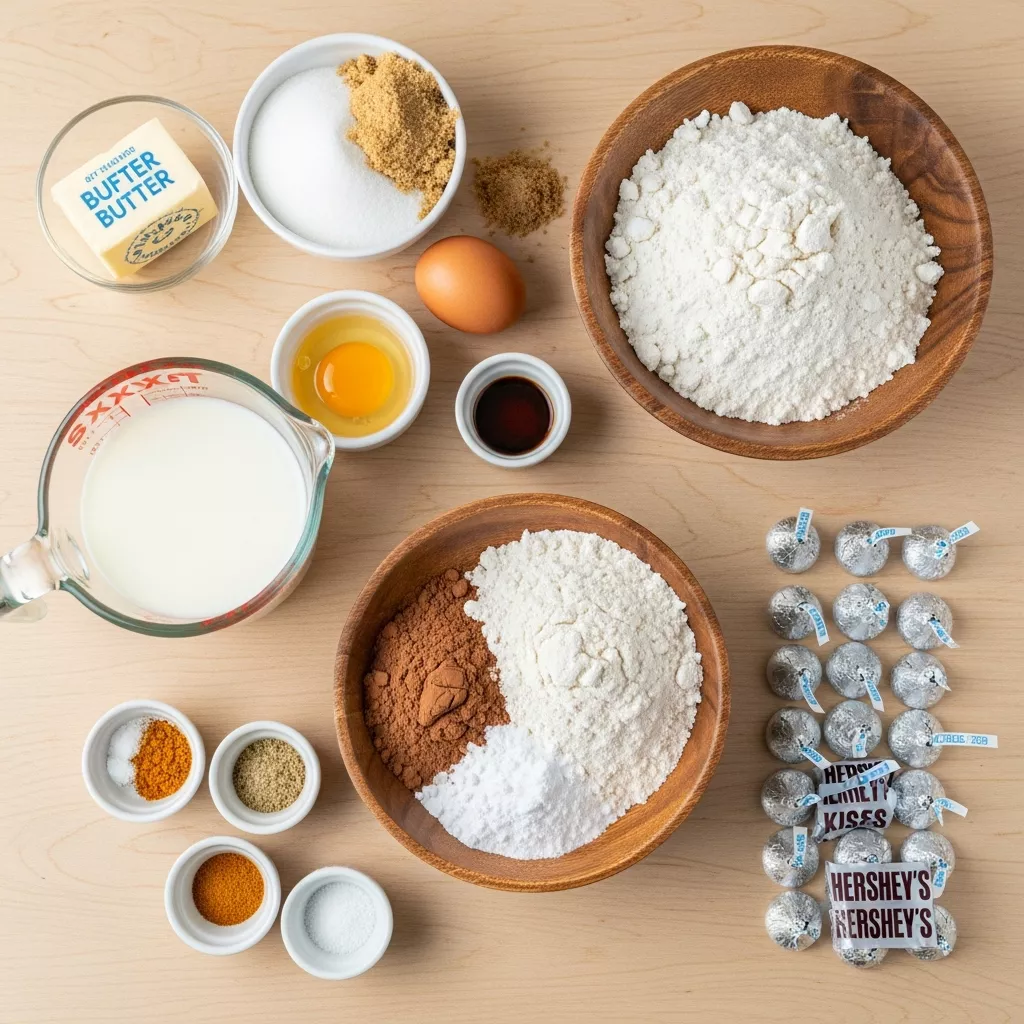
- 1/2 cup (1 stick) unsalted butter, softened
- 3/4 cup granulated sugar
- 1/4 cup packed light brown sugar
- 1 large egg
- 1 teaspoon vanilla extract
- 1 ounce red food coloring
- 2 1/4 cups all-purpose flour
- 1/4 cup unsweetened cocoa powder
- 1 teaspoon baking soda
- 1/2 teaspoon salt
- 1/2 cup buttermilk
- 24 Hershey’s Milk Chocolate Kisses, unwrapped
Directions
Step 1
Red velvet blossoms cookies makes every moment feel lush. Preheat oven to 375°F (190°C). Line baking sheets with parchment paper.
Step 2
In a large bowl, cream together the softened butter, granulated sugar, and brown sugar until light and fluffy.
Step 3
Beat in the egg and vanilla extract until well combined. Stir in the red food coloring.
Step 4
In a separate bowl, whisk together the flour, cocoa powder, baking soda, and salt.
Step 5
Gradually add the dry ingredients to the wet ingredients, alternating with the buttermilk, beginning and ending with the dry ingredients. Mix until just combined. Be careful not to overmix.
Step 6
Roll the dough into 1-inch balls and place them on the prepared baking sheets, leaving some space between each cookie.
Step 7
Bake for 8-10 minutes, or until the edges are set.
Step 8
Immediately press a Hershey’s Kiss into the center of each cookie while they are still warm. The heat will slightly melt the chocolate, creating a perfect bond.
Step 9
Let the cookies cool completely on the baking sheets before serving. This will prevent them from breaking apart.
Variations, pairings, and serving ideas
Variations
There are many ways to customize your red velvet blossoms cookies! For a fun twist, use different flavors of Hershey’s Kisses, such as caramel or dark chocolate. You can also add chopped nuts, chocolate chips, or even dried cranberries to the dough for added texture and flavor.
If you want to make them even more festive, roll the dough balls in sprinkles before baking. Red, white, and green sprinkles are perfect for the holidays, but you can use any color combination you like. Another variation is to add a teaspoon of almond extract to the dough for a subtle nutty flavor.
For a dairy-free option, you can substitute the buttermilk with plant-based milk mixed with a teaspoon of lemon juice or vinegar. Make sure the plant-based milk is unsweetened for the best results.
Pairings
Red velvet blossoms cookies are delicious on their own, but they also pair well with a variety of drinks. A glass of cold milk or a cup of hot coffee are classic choices. For a more sophisticated pairing, try serving them with a glass of sparkling cider.
These cookies also complement other desserts beautifully. Serve them alongside a slice of vanilla ice cream or a warm brownie for a decadent treat. They are also a great addition to a dessert charcuterie board, along with other cookies, candies, and fruits.
If you are looking for another savory snack to enjoy, take a look at this article about homemade pizza pockets, which offers another delicious option.
Serving ideas
Presentation is key when serving these delightful red velvet blossoms cookies. Arrange them on a pretty platter or in a decorative tin to make them even more appealing. Dusting them with a light coating of powdered sugar can also add a touch of elegance.
Consider serving them as part of a dessert buffet for a holiday party or special occasion. They are also a thoughtful homemade gift for friends and neighbors. Package them in cellophane bags tied with ribbon for a festive touch. If you’re looking for more inspiration, check out these delicious appetizer recipes at CookReel, perfect for any gathering.
You can also use these cookies as a base for mini ice cream sandwiches. Simply place a scoop of your favorite ice cream between two cookies and enjoy! This is a fun and easy way to elevate this classic treat.
Storage and make-ahead tips
Storage
To store your red velvet blossoms cookies, place them in an airtight container at room temperature. They will stay fresh for up to 3-4 days. To maintain their soft texture, consider adding a slice of bread to the container to help absorb moisture.
If you want to store them for longer, you can freeze them. Place the cooled cookies in a single layer on a baking sheet and freeze for about 30 minutes. Then, transfer them to a freezer-safe bag or container. They can be stored in the freezer for up to 2-3 months.
When you’re ready to enjoy them, simply thaw them at room temperature for about 30 minutes. They will taste just as delicious as the day they were baked!
Make-ahead
These red velvet blossoms cookies are perfect for making ahead of time. You can prepare the dough up to 24 hours in advance and store it in the refrigerator. Just make sure to wrap it tightly in plastic wrap to prevent it from drying out.
When you’re ready to bake, simply roll the dough into balls and bake as directed. You can also freeze the dough balls for up to 2-3 months. Place them on a baking sheet and freeze until solid, then transfer them to a freezer-safe bag or container.
When you’re ready to bake, there’s no need to thaw them; just add a few minutes to the baking time. This is a great way to have fresh, warm cookies whenever you want them!
Common mistakes when making Red Velvet Blossoms Cookies
- Overmixing the dough: Overmixing can lead to tough cookies. Mix until just combined.
- Not creaming the butter and sugar properly: Creaming the butter and sugar until light and fluffy is essential for a tender cookie. Make sure your butter is properly softened.
- Baking the cookies for too long: Overbaking will result in dry, crumbly cookies. Keep a close eye on them and remove them from the oven when the edges are set.
- Not pressing the Hershey’s Kisses in immediately: Press the Hershey’s Kisses into the cookies while they are still warm, so they adhere properly.
- Using cold ingredients: Using room temperature ingredients helps ensure that everything mixes together evenly, resulting in a better texture.
Final notes
These red velvet blossoms cookies are a delightful treat that’s perfect for any occasion. Their vibrant color, soft texture, and delicious flavor combination make them a guaranteed crowd-pleaser. Don’t be intimidated by the recipe—it’s easier than you might think!
Remember to use good quality ingredients and follow the directions carefully for the best results. With a little practice, you’ll be baking perfect red velvet blossoms cookies in no time. And don’t be afraid to experiment with different variations to create your own signature version!
So go ahead, gather your ingredients, preheat your oven, and get ready to bake up a batch of these irresistible cookies. You and your loved ones will be so glad you did!
Loved this Red Velvet Blossoms Cookies? Try these next
- Apple Cider Cupcakes Recipe
- Homemade Pizza Pockets Recipe
- Easy chocolate cake
- Lemon poppy seed muffins
- Classic sugar cookies

Red Velvet Blossoms Cookies
Bake up a batch of these festive Red Velvet Blossoms Cookies! Soft, chewy red velvet cookies topped with a Hershey’s Kiss, perfect for holidays or any day.
- Total Time: 30 minutes
- Yield: 24 cookies 1x
Ingredients
- 1/2 cup (1 stick) unsalted butter, softened
- 3/4 cup granulated sugar
- 1/4 cup packed light brown sugar
- 1 large egg
- 1 teaspoon vanilla extract
- 1 ounce red food coloring
- 2 1/4 cups all-purpose flour
- 1/4 cup unsweetened cocoa powder
- 1 teaspoon baking soda
- 1/2 teaspoon salt
- 1/2 cup buttermilk
- 24 Hershey's Milk Chocolate Kisses, unwrapped
Instructions
- Preheat oven to 375°F (190°C). Line baking sheets with parchment paper.
- In a large bowl, cream together the softened butter, granulated sugar, and brown sugar until light and fluffy.
- Beat in the egg and vanilla extract until well combined. Stir in the red food coloring.
- In a separate bowl, whisk together the flour, cocoa powder, baking soda, and salt.
- Gradually add the dry ingredients to the wet ingredients, alternating with the buttermilk, beginning and ending with the dry ingredients. Mix until just combined.
- Roll the dough into 1-inch balls and place them on the prepared baking sheets, leaving some space between each cookie.
- Bake for 8-10 minutes, or until the edges are set.
- Immediately press a Hershey's Kiss into the center of each cookie while they are still warm.
- Let the cookies cool completely on the baking sheets before serving.
Notes
For best results, use room temperature ingredients. Store cookies in an airtight container at room temperature. You can substitute white chocolate kisses for a different flavor profile. To make these cookies extra festive, roll the dough balls in sprinkles before baking!
- Prep Time: 20 minutes
- Cook Time: 10 minutes
- Category: Dessert
- Method: Baking
- Cuisine: American
Nutrition
- Serving Size: 1 cookie
- Calories: 150
- Sugar: 12g
- Sodium: 80mg
- Fat: 7g
- Saturated Fat: 4g
- Unsaturated Fat: 2g
- Trans Fat: 0g
- Carbohydrates: 20g
- Fiber: 0.5g
- Protein: 1g
- Cholesterol: 25mg